Archives

Connect to an ANT+ device

Supported profiles

Currently RIDE-1 supports following profiles.

  • Speed and cadence (SPD&CAD)
  • Speed (SPD)
  • Cadence (CAD)
  • Heard rate (HRM)

How to connect

  1. Power on the ANT+ device and get ready to connect RIDE-1.
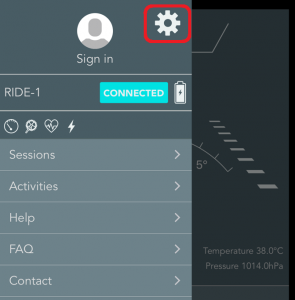
  2. Launch the RIDE-1 app and tap the menu icon.
    df1-13
  3. Tap the wheel icon.
    df1-14
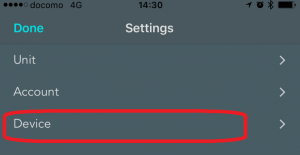
  4. Tap [Device]
    df1-32
  5. Tap [ANT+]
    df1-33
  6. Tap the ANT+ device name under Found sensors.
    df1-67
  7. Make sure that the device name you selected moves to Registered sensors.
    df1-68

Session

RIDE-1 can send information to XON Cloud via its smartphone app and enable you to share information in real time with your team members (live telemetry function). To use the live telemetry function, you need to create a Session and join it.
How to make a Session

  1. Sign in to your account.
    See this link for how to sign in.
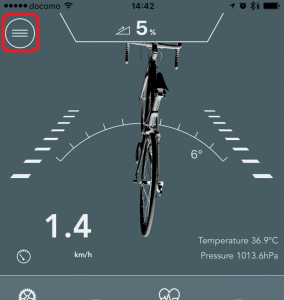
  2. Tap the menu icon and open the menu list.
    df1-13
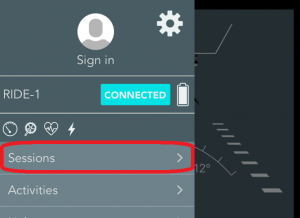
  3. Tap [Sessions]
    df1-24
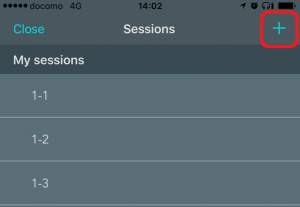
  4. Tap [+]
    df1-25
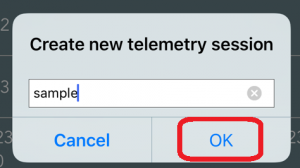
  5. Enter the name of the session and tap [OK].
    df1-26

How to join your own Session

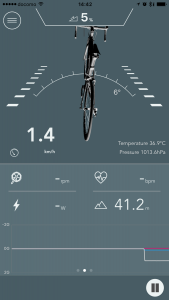
  1. Go to the main page.
    df1-27
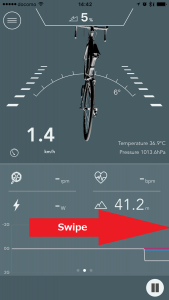
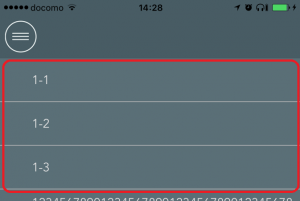
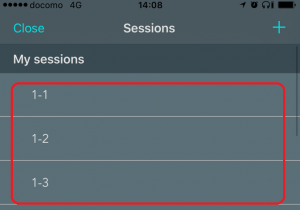
  2. Swipe the screen left to right. The sessions you have made are listed on the screen.
    df1-28
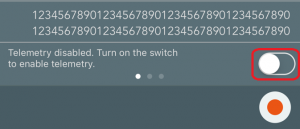
  3. Tap the switch to start telemetry if the telemetry function is disabled.
    df1-62
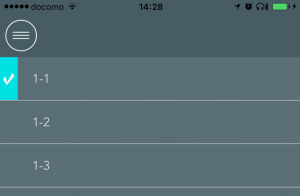
  4. Tap the session you want to join. A check mark will appear on the left side of the session name.
    df1-63
    df1-64

How to join other Sessions

  1. Sign in your account. See this link for how to sign in.
  2. Tap the menu icon.
    df1-13
  3. Tap [Sessions]
    df1-24
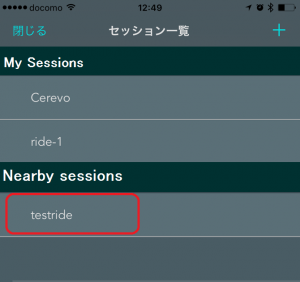
  4. Other Sessions are listed under Nearby sessions. Select the session you want to join.
    df1_55
  5. Make sure that the session you selected is listed under My sessions.
  6. Go to the main page of the app.
    df1-27
  7. Swipe the screen left to right. Then the sessions will be listed on the screen.
    df1-28
  8. Tap the switch to start telemetry if the telemetry function is disabled.
    df1-62
  9. Tap the session which you want to join. A check mark will appear on the left side of the session name.
    df1-63
    df1-64

How to check a Session you have joined

  1. Sign in your account. See this link for sign in details.
  2. Tap the menu icon and open the menu list.
    df1-13
  3. Tap [Sessions]
    df1-24
  4. Tap the session you want to see details of.
    df1-29

How to share a Session

You can share session information, such as the current location of members with by the following steps. Anyone with the shared link will then be able to see that information via internet.

  1. Sign in your account. See this link for sign in details.
  2. Tap the menu icon and open the menu list.
    df1-13
  3. Tap [Sessions]
    df1-24
  4. Tap the session you want to share.
    df1-29
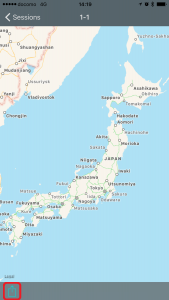
  5. Tap the share icon.
    df1-30
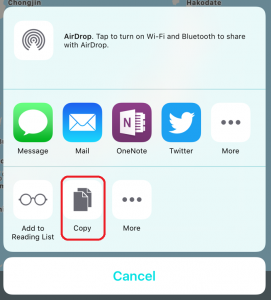
  6. Tap [Copy] and get the URL.
    df1-31
  7. Share the URL.

Upload recorded activity logs

  • You need to sign in to XON Cloud to upload activity logs. Please sign in to XON Cloud before uploading logs. For details on how to sign in, see this link.
  • A Wi-Fi connection is required to upload logs. See this link for Wi-Fi setup.

Steps

  1. Tap the menu icon and open the menu list.
    df1-13
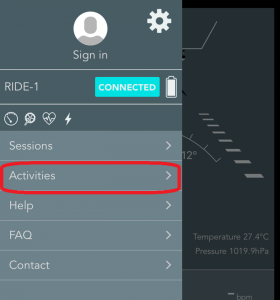
  2. Tap [Activities]
    df1-21
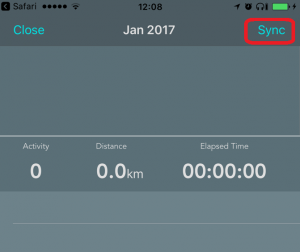
  3. Tap [Sync]
    df1-22
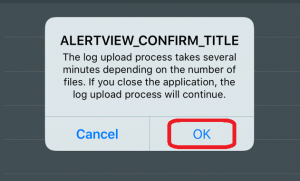
  4. Confirm the message and tap [OK]. Uploading will begin.
    df1-23

Tips

  • Uploading may take several minutes depending on the speed of the Wi-Fi connection and length of logs uploaded.


Check activity logs

Checking on the app

  1. Tap the menu icon.
    df1-13
  2. Tap [Activities].
    df1-21
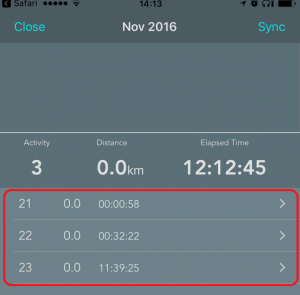
  3. Activity logs are listed on the screen, tap the one you want to check.
    df1-60
  4. Check your activity log.

Tips

  • It takes about 10 mins after recording for activity logs to appear.

Checking on XON Cloud

  1. Access to XON Cloud.
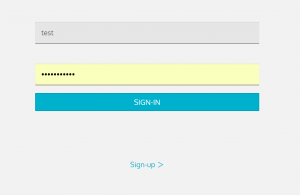
  2. Enter your username and password then click [SIGN-IN].
    See this link to make an account.
    df1-59
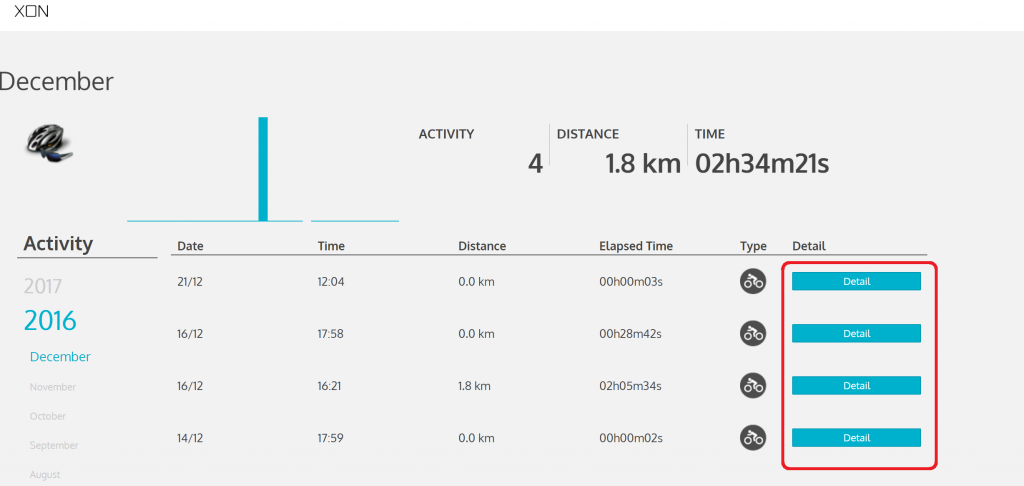
  3. Activity logs that you have uploaded will belisted. Tap [Detail] to see more details from each log.
    df1-61

Tips

  • It takes about 10 mins after recording for activity logs to appear.

Record an activity log

RIDE-1 can record an activity log using the following steps.
Preparations

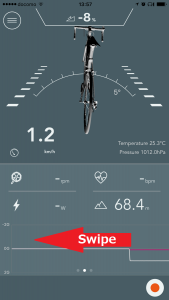
  • Make sure that the bike image on the app reflects the actual position of your bike.
    Please try re-calibrating if the bike image on your app is not showing the actual position. See this link to calibrate.
  • Make sure that your RIDE-1 is receiving a GPS signal.
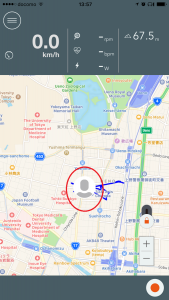
    When RIDE-1 receives a GPS signal, your icon is will appear on the map.
    You can see the map screen by swiping from right to left on the main screen.
    df1-55df1-56

Start recording

Tap the record icon or press the main button on the device, a sound will play and the activity log will begin recording. The record icon will change to a pause icon while RIDE-1 is in recording mode.

df1-57
df1-58

Stop recording

Tap the pause icon or press the main button on the device.

df1-58

Wi-Fi setup

RIDE-1 can upload recorded activity logs to XON Cloud and update firmware via a Wi-Fi connection.

Please follow the steps below to connect RIDE-1 to a Wi-Fi network.

  1. Tap the menu icon.
    df1-13
  2. Tap the wheel icon.
    df1-14
  3. Tap [device].
    df1-32
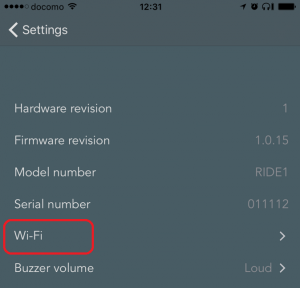
  4. Tap [Wi-Fi].
    df1-51
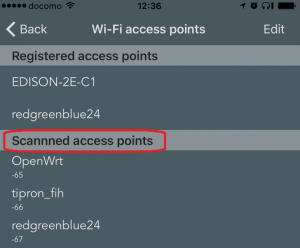
  5. RIDE-1 will start scanning for Wi-Fi access points and list them under Scanned access points. Tap the Wi-Fi access point you want to connect to.
    df1-52
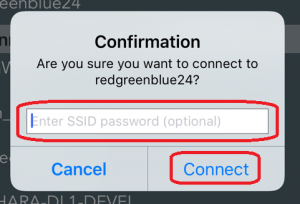
  6. Enter a password if necessary and then tap [Connect].
    df1-53
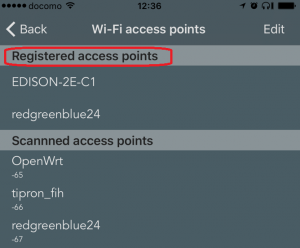
  7. The Wi-Fi connection will be listed under Registered access points if setup is successful.
    df1-54

Calibration

How to calibrate

  1. Launch the app and tap the menu icon.
    df1-13
  2. Tap the wheel icon
    df1-14
  3. Tap [Device]
    df1-32
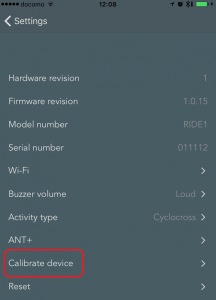
  4. Tap [Calibrate device]
    df1-45
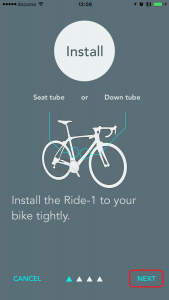
  5. Install RIDE-1 onto your bike, then Tap [NEXT].
    See this link for installing the unit onto a bike.
    df1-46
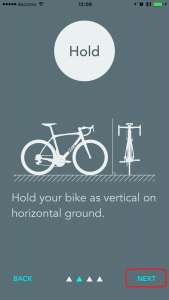
  6. Hold your bike upright on horizontal ground. Tap [NEXT].
    df1-47
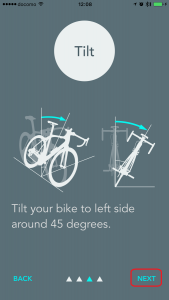
  7. Tilt your bike 45 degrees to the left and tap [NEXT]
    df1-48
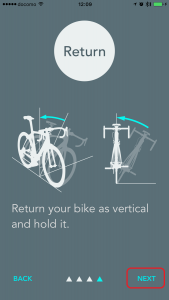
  8. Return your bike to an upright position and hold it. Then tap [NEXT]
    df1-49
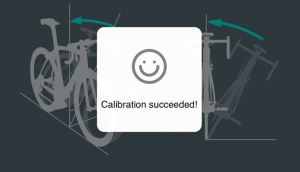
  9. Calibration is complete when the message “Calibration successful!” is displayed.
    df1-50

Sign in/out

It is possible to save activity log data even if you do not sign into your account. However, some functions like uploading the activity log to XON Cloud or joining a riding session will not be available.

Please sign in to your account to use all functions.

How to sign in

  1. Tap the menu icon and open the menu list.
    df1-13
  2. Tap the wheel icon.
    df1-14
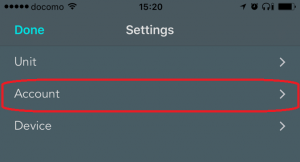
  3. Tap [Account]
    df1-15
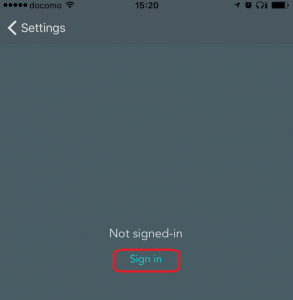
  4. Tap [Sign in]
    df1-16
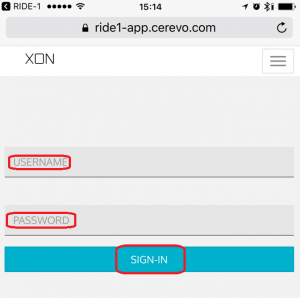
  5. Enter your username and password, then tap [SIGN-IN].
    df1-17
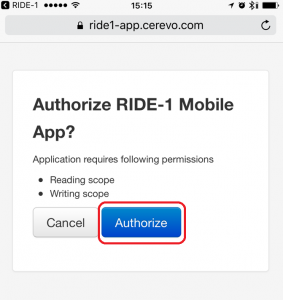
  6. Confirm the message “Authorize RIDE-1 Mobile App?” then tap [Authorize].
    df1-18
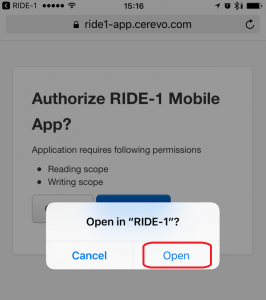
  7. Tap [Open]
    df1-19

How to sign out

  1. Tap the menu icon and open the menu list.
    df1-13
  2. Tap the wheel icon.
    df1-14
  3. Tap [Account]
    df1-15
  4. Tap [Sign out]
    df1-20

Connect RIDE-1 to app

Turn RIDE-1 on

  1. Press the main button for 3 seconds, the start-up melody will play.
  2. Check the LED flashes blue.

Connect RIDE-1 to app

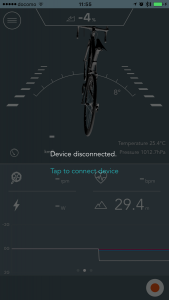
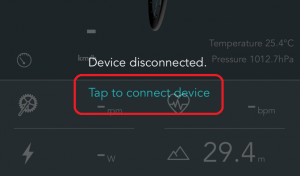
  1. Launch the app, the message “Device disconnected. Tap to connect device”  will be displayed.
    df1-41
  2. Tap [Tap to connect device]
    df1-42
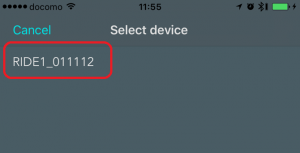
  3. RIDE-1’s serial numbers are listed on screen. Tap the one that match your RIDE-1.
    To confirm your RIDE-1 serial number, see this link.
    df1-43
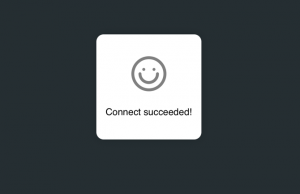
  4. Connection is complete when the message “Connection succeeded!” is shown.
    df1-44

About app main page

Please check this link to see a detailed explanation.


Account settings for XON Cloud

Cerevo provides a web application named XON Cloud to see and analyze activity logs.
To use XON Cloud, you need to make an account.
How to make an account

  1. Access this link.
  2. Click [Sign-up].
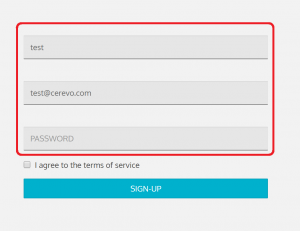
  3.  Enter a Username, E-mail address and Password.
    df1-37
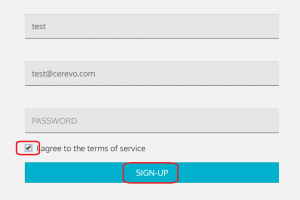
  4. Check the terms of service box, then click [SIGN-UP].
    df1-36
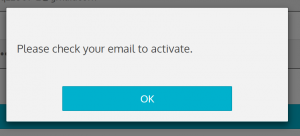
  5. After the message “Please check your email to activate.” is displayed, check your mail box.
    df1-38
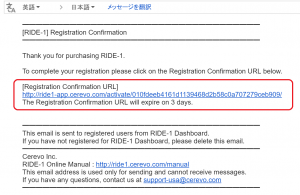
  6. Access the [Registration Confirmation URL] in the mail.
    df1-39
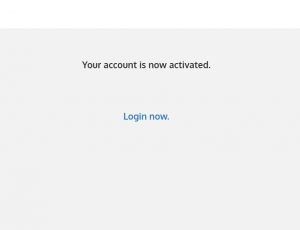
  7. Making an account is complete if “Your account is now activated” is displayed.
    df1-40