Archives

Install the RIDE-1 App

iOS

Download the smartphone app here.
iOS 9.0 or later required

Android

Download the smartphone app here.
Android 4.3 or later required

Installation instructions

Mountable positions

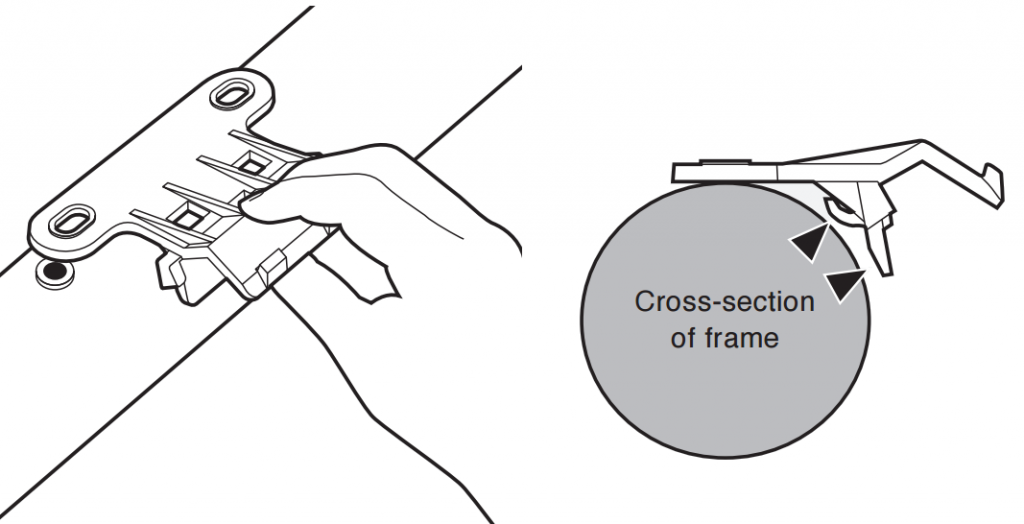
RIDE-1 is mountable on both the seat tube and down tube. Install the bike mount securely, then install RIDE-1 into the bike mount with the logo visable. Please make sure to install RIDE-1 in the correct orientation, RIDE-1 may detatch during riding if installed incorrectly.
df1-6

Installation instructions

  1. Select a bike mount from the 3 suppplied sizes. Check the indicated points are more than 3mm apart.
    df1-7
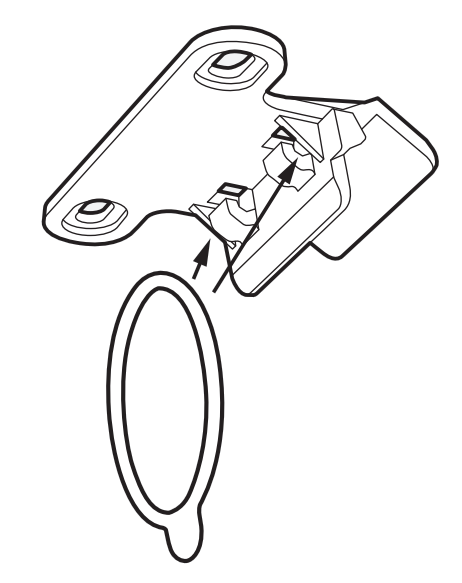
  2. Insert the rubber band into the bottom-side hooks.
    df1-8
  3. Attach the bike mount to the frame with the provided screws. Install bottle cages, pumps or other accessories on top of the bike mount.
    df1-9

Attach the main body to the mount

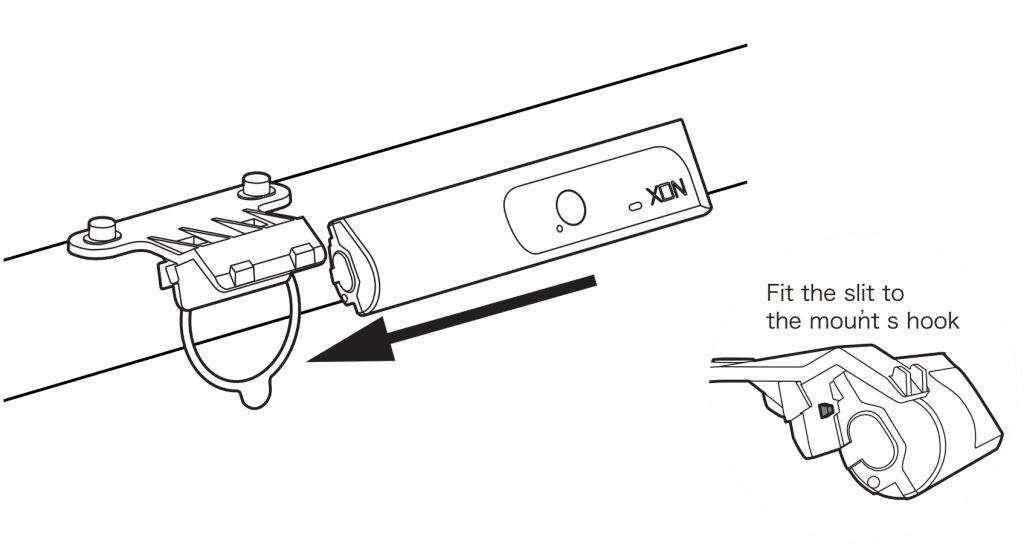
  1. Slide the main body onto the bike mount as pictured.
    df1-10
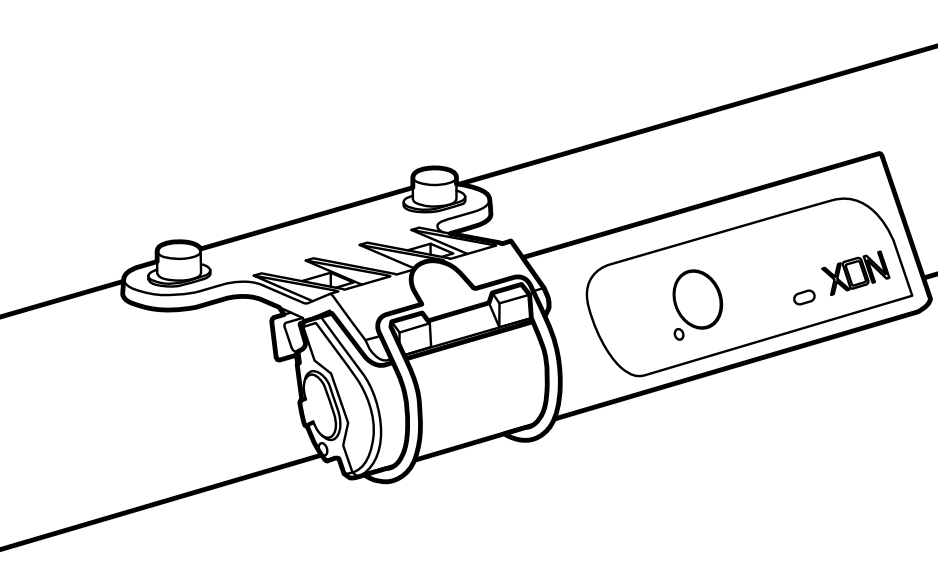
  2. Stop sliding when the bike mount stopper comes into contact with the corner of the main body.
    df1-11
  3. Fasten the rubber band. Check the main body does not move when the bike is shaken.
    df1-12

Cautions/Safety Advice

  • Before riding, turn the pedals several times to make sure they are not obstructed by RIDE-1 or its mount. If they touch, change the bike mount position.
  • Do not start riding without fastening the rubber band strap, without the strap RIDE-1 could detatch from the mount.

Battery Charging

*Please charge the battery before initial setup or after more than 1 week in storage.*

How to charge

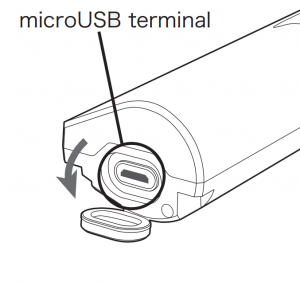
Open the rubber cap and connect the USB charging cable to a mobile battery changer or a USB to AC adapter. Charge for more than 4 hours to fully charge the battery.
After charging, disconnect the USB charging cable and close the rubber cap tightly.
df1-5

Cautions/Safety Advice

  • Do not leave the unit plugged in when it is fully charged.
  • Use the USB cable which is included in the box contents.
  • Use a 5V 1A power supply.
  • Do not carry the product by holding the rubber cap and do not use excessive force when pulling on the rubber cap.
  • Do not twist or bend the USB charging cable while charging.
  • Do not use if the rubber cap can not be closed tightly, doing so could allow water inside causing a malfunction.

Tips

  • In sleep mode, the LED lights up red while charging. When the battery is full, the LED turn off. The companion smartphone app will indicate remaining battery level when the USB cable is disconnected.
  • The battery icon shows charging status in the RIDE-1 app.


About RIDE-1

Overview

df1-2

Unit operations

●Power on

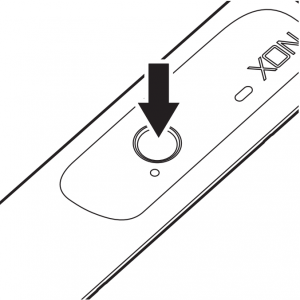
Press the main button for 3 seconds, then the start-up melody will play.
The LED light will flash blue when RIDE-1 is powered-on.

●Sleep mode

Changing to sleep mode when not in use is recommended because sleep mode can save battery consumption.
During sleep mode RIDE-1 does not emit any electromagnetic signals. When transporting RIDE-1 by airplane, please enable sleep mode.

  1. Hold down the main button for more than 3 seconds.
  2. A short melody will sound and RIDE-1 will change to sleep mode.

*To cancel sleep mode, hold down the main button again for more than 3 seconds.
df1-3

●Force reset

When the product does not work correctly or an abnormal action occurs, you can reset it by pressing the reset button. Firmly press the reset button using a thin, stiff object of less than 2mm in diameter. When the system reset succeeds, the start-up melody will play.

*Do not use a needle or other sharp metal objects to press the button. Doing so may cause a malfunction or an electrical short circuit.

df1-4

About LED status

  • No light : sleep mode and not charging.
  • Red light : sleep mode and charging.
  • Repeating blue flash : power-on
  • Repeating double blue flash : recording activity logs or setting Wi-Fi/ANT+ connectivity.


Included items

Check all items are in the product box.

  • RIDE-1
  • Bike mount x 3(size S,M,L)
  • Rubber band
  • USB charge cable
  • Hexagonal socket head cap screw x 2

df1-1


Before using RIDE-1

Requirements

  • RIDE-1 and icluded items
  • hexagon wrench( not icluded items)
  • smartphone
    iOS 9.0~ or Android 4.3~

Precautions

  • RIDE-1 is designed to be mounted on any bike that has a mounting for a bottle cage. It is not possible to install RIDE-1 on a bike frame that does not have screw-nuts for bottle cage mounting. Do not use without the bike mount part provided in the product box.
  • RIDE-1 can be used in temperatures of -10℃ to 50℃ and in less than 90% humidity environments. Low or high temperatures may cause the battery to lose charge quicker than usual.
  • RIDE-1 is splashproof and can be used in the rain. Do not use RIDE-1 underwater and do not place under heavy water flow. Remove water from the body before charging and charge in a dry place. Do not use near a fire.
  • After use, clean the product and store it in a dry room at room temperature. Make sure that it is not exposed to direct sunlight or high temperatures.
  • After you have finished reading, please store this manual in a safe, easily accessible place.
  • Use a 5V 1A power supply.
  • Do not carry the product by holding the rubber cap and do not use excessive forcce when pulling on the rubber cap.
  • Do not twist or bend the USB charging cable while charging.
  • Do not use if the rubber cap can not be closed tightly, doing so could allow water inside causing a malfunction.

Home

Thank you for purchasing Cerevo’s SNOW-1.
This manual will provide you with important information on setup, usage and maintenance.
Please read this manual carefully and follow all instructions.

Home

Thank you for purchasing Cerevo’s RIDE-1.
This manual will provide you with important information on setup, usage and maintenance.
Please read this manual carefully and follow all instructions.

3-2. App menu

Tap the bottom left menu icon to displayed the App menu.
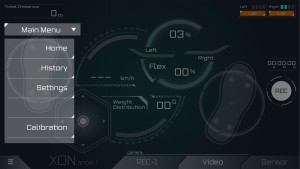
    1. Home
      Close the menu and go back to the main screen. You can also close the menu by tappping outside of the menu area.
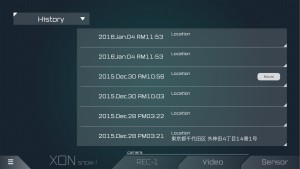
    2. History
      You can replay your previously recorded data. Tap an entry from the list to then move to thereplay screen. If the data was recorded in [Video] mode, a [Video] mark will added to the list. If the data was recorded while your smartphone’s GPS feature was active, you can see the GPS location.
      On the replay screen, the data will playback in a loop. You can switch playback modes by tapping the bottom menu.
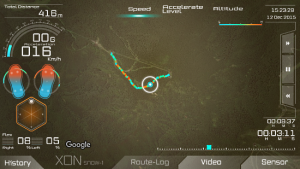
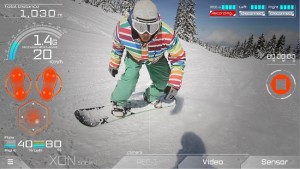
      • Route-log: Sensor data with a GPS based route log (map).
      • Video: Sensor data with video recorded by your smartphone camera.
      • Sensor: Sensor data only.

      Tap [History] and to go back to the history list.
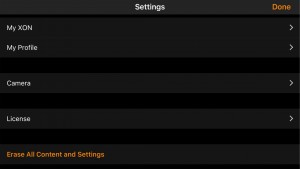
    3. Settings
      General settings menu for XON series devices.

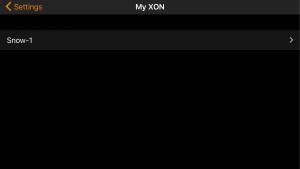
      • My XON
        Confirm and change current connected devices. As of March 2016, only SNOW-1 can be set.

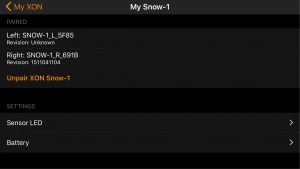
        • PAIRED

          Shows the device ID  of each connected device and you can also unpair SNOW-1.
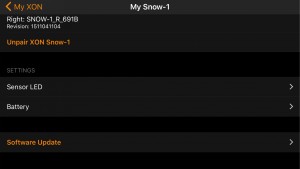
        • Sensor LED
          Turn on/off binding sensor LEDs (toe and heel).
        • Battery
          Turn on/off, auto power off.
        • Software Update

          Check for the latest version and update embedded SNOW-1 software. If an update is available, follow the instructions.
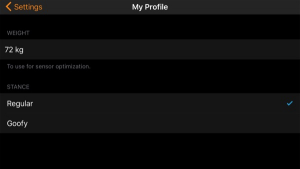
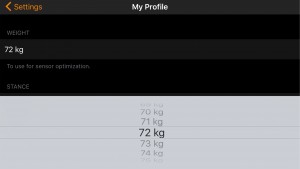
      • My Profile
        Set your weight and stance.
        ss1_cap_setting01
      • Camera
        Set video resolution, default setting is high.

        • High : 1280×720 / approx. 9.5Mbps
        • Middle : 640×480 / approx. 3.9Mbps
        • Low : 192×144 / approx. 176Kbps
      • License
        Show the app software license.
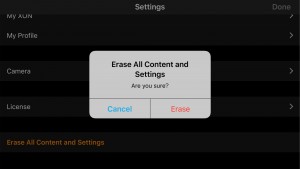
      • Erase all content and settings
        Initialize/reset your app and erase all data.
    4. Calibration
      You can re-calibrate your device, follows the same procedure described during initial set up. Tap the [START] button and follow the instructions.

After changing settings, tap [Done] on the top right of the settings screen and go back to the main screen.
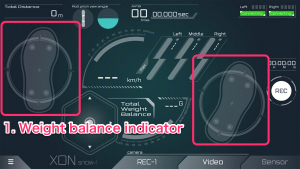
3-1. App screen guide

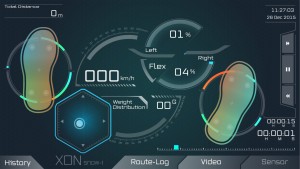
  1. Weight balance indicator
    ss1_cap_mainscreen01
    This area shows the realtime weight balance. The color of each soleprint will change depending on the amount of weight detected.
    Gray: Binding is not connect to the app.
    Light blue: Connected to the app but weight is undetectable.
    From bluegreen to red: Connected to the app and weight is detectable. Bluegreen indicates light weight and red indicates heavy weight.
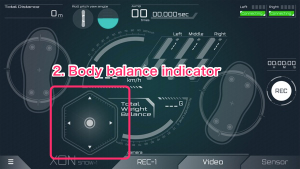
  2. Body balance indicator
    ss1_cap_mainscreen02
    Displays your of the center of gravity on the board, the indicator will show if you are bent forward/backward or leaning to either side.
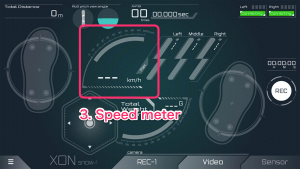
  3. Speed meter
    ss1_cap_mainscreen03
    While you are snowboarding with the app (active on your smartphone), your smartphone will be used to detect speed relative to the ground. If somebody is in another location holding the smartphone, the speed meter will stay at zero. SNOW-1 doesn’t have a built-in speed sensor.
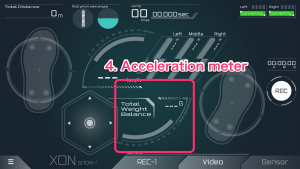
  4. Acceleration meter
    ss1_cap_mainscreen04
    While you are snowboarding with the app (active on your smartphone), your smartphone will be used to detect acceleration speed. It can measure up to 10G.
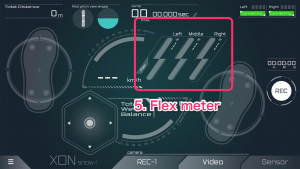
  5. Flex meter
    ss1_cap_mainscreen05
    Shows how much the board is being bent. The greater the value, the more bending.
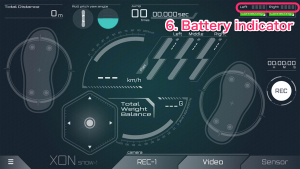
  6. Battery indicator
    ss1_cap_mainscreen06
    There are four square indicators and each indicator shows 25% capacity of the battery, e.g. three of the four on indicates 50 to 75% battery remaining.
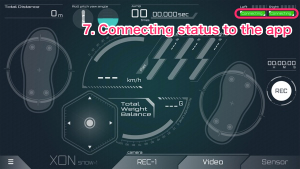
  7. App connection status
    ss1_cap_mainscreen07
    3 options will be displayed – Lost (cannot find SNOW-1), Connecting and Connected.
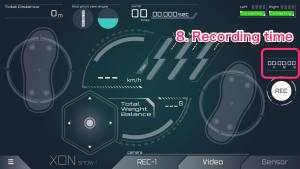
  8. Recording time
    ss1_cap_mainscreen08
    Shows the duration of recording data.
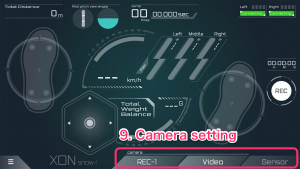
  9. Camera settings
    ss1_cap_mainscreen09
    Switch between 3 camera modes.
    REC-1: This mode is under development.
    Video: Record video using your smartphone’s camera.
    Sensor: Only sensor data will be recorded (no video mode).
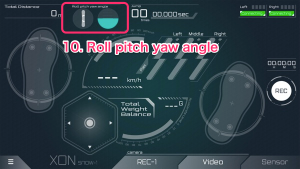
  10. Roll/pitch/yaw angle
    ss1_cap_mainscreen10
    Displays the angle of your board.
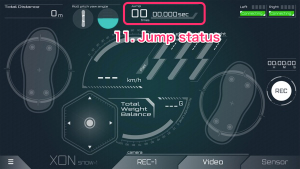
  11. Jump status
    ss1_cap_mainscreen11
    Displays how many times you jump and the length of air time.
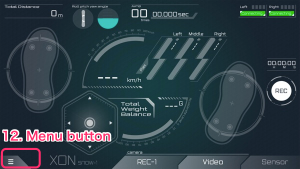
  12. Menu button
    ss1_cap_mainscreen12
    Open app menu, see 3-2 for more information.